Configure a Free SSL Certificate for WordPress Website (HTTP to HTTPS) – Quick Guide
Absolutely, you read it right ! You can configure a free SSL certificate for your WordPress website to enable HTTPS. Here’s a clear, step-by-step guide:
First things first, An SSL (Secure Sockets Layer) certificate is a digital protocol that encrypts the connection between a website and its visitors, ensuring that data such as passwords, payment information, and personal details remain secure. Configuring SSL on your WordPress website not only protects sensitive information from potential cyber security threats but also boosts user trust, improves your site’s credibility, and positively impacts search engine rankings.
In today’s online environment, enabling HTTPS through SSL has become a fundamental step for any website owner who wants to provide a safe and professional browsing experience. Here is our article to help you understand cyber security: 15 FAQs to Help You Understand Cyber Security – Exceediance
Table of Contents
Free vs. Paid SSL Certificates: What’s the Difference?
When securing your WordPress website, you have the option of using free SSL certificates, such as Let’s Encrypt, or investing in paid SSL certificates. While both serve the primary purpose of encrypting data between your site and visitors, there are key differences to consider:
| Feature | Free SSL (e.g., Let’s Encrypt) | Paid SSL |
|---|---|---|
| Cost | Free of charge | Typically $10–$200+ per year, depending on type and validation level |
| Validation Type | Domain Validation (DV) only | Domain Validation (DV), Organization Validation (OV), Extended Validation (EV) |
| Warranty | No monetary warranty | Some paid SSL certificates include warranties up to millions for potential breaches |
| Support | Limited support (mostly community or hosting provider) | Dedicated support from the SSL provider |
| Certificate Lifespan | Short (usually 90 days) but auto-renewable | Longer (1–2 years), renewal may require manual verification |
| Trust Indicator | Basic padlock in browser | Padlock + organization name in address bar (EV SSL) for enhanced credibility |
| Use Case | Personal blogs, small business sites, informational websites | E-commerce sites, financial institutions, enterprise-level websites requiring high trust |
Key Takeaways
- Free SSL: Perfect for small sites, blogs, and new WordPress sites. It offers encryption and basic trust at no cost.
- Paid SSL: Best for businesses handling sensitive data, e-commerce platforms, or websites that want to display the organization’s name in the browser for additional trust.
Ultimately, both free and paid SSL certificates encrypt data, but the choice depends on your website’s security needs, trust requirements, and level of professional credibility.
How to Configure Free SSL Certificate
1. Check Hosting Provider
Most WordPress hosting providers (e.g., Namecheap, Bluehost, SiteGround, Hostinger, GoDaddy) offer free SSL certificates via Let’s Encrypt.
- Log in to your hosting account.
- Look for “SSL / HTTPS” or “Security” settings.
- If a free certificate is available, you can enable it with one click.
2. Install Free SSL via Let’s Encrypt (if not auto-enabled)
If your host doesn’t automatically provide SSL:
- Log in to cPanel (or equivalent control panel).
- Go to “SSL/TLS” → “Let’s Encrypt”.
- Select your domain and install the certificate.
- Wait a few minutes for installation to complete.
3. Force WordPress to Use HTTPS
Once SSL is installed, you need to redirect your site from HTTP → HTTPS.
Option A: Using a Plugin (Easiest)
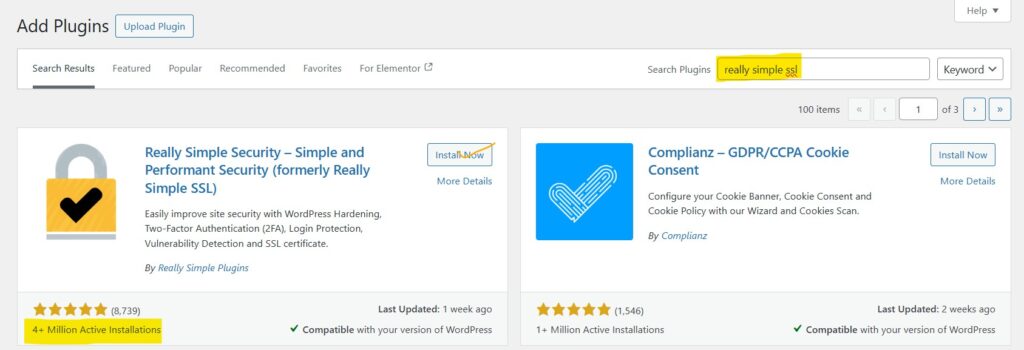
- Install Really Simple SSL plugin:
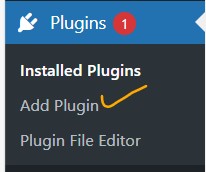
- Go to WordPress Dashboard → Plugins → Add New.
- Search for “Really Simple SSL”, install, and activate.
- The plugin detects SSL and automatically configures HTTPS redirection.
Option B: Manual via .htaccess
- Edit your
.htaccessfile in the WordPress root folder. - Add the following lines at the top:
apacheCopyRewriteEngine On
RewriteCond %{HTTPS} !=on
RewriteRule ^(.*)$ https://%{HTTP_HOST}%{REQUEST_URI} [L,R=301]
- Save the file. This forces all traffic to HTTPS.
4. Update WordPress Settings
- Go to Settings → General in WordPress.
- Change:
- WordPress Address (URL) →
https://yourdomain.com - Site Address (URL) →
https://yourdomain.com
- WordPress Address (URL) →
- Save changes.
5. Check for Mixed Content
- Some assets (images, scripts, CSS) may still load via HTTP.
- Use the Really Simple SSL plugin or a tool like Why No Padlock to detect and fix mixed content.
✅ Summary
- You don’t need to pay; Let’s Encrypt is free and trusted.
- Plugin like Really Simple SSL simplifies configuration.
- After setup, all traffic will redirect to HTTPS, and your site will show the secure padlock.
Here is the wordpress plugin: Really Simple Security – Simple and Performant Security (formerly Really Simple SSL) – WordPress plugin | WordPress.org
How to Configure Free SSL for WordPress on Namecheap
Securing your WordPress website with HTTPS is essential for trust, SEO, and security. Here’s how to do it on Namecheap.
1. Log in to Your Namecheap Account
- Go to Namecheap.com and log in.
- Navigate to “Dashboard” → “Hosting List”.
- Click “Manage” next to the domain/hosting where WordPress is installed.
2. Check If Free SSL is Available
- Namecheap provides free PositiveSSL (via Comodo) for new domains or Let’s Encrypt SSL for shared hosting.
- Look for “SSL/TLS” in your hosting dashboard.
- If it’s available, click “Activate Free SSL” or “Install”.
⚠️ It may take 5–15 minutes for the certificate to be issued.
3. Enable SSL for Your Domain
- After activation, ensure your domain is selected.
- If your hosting is cPanel-based, the SSL certificate will appear under cPanel → Security → SSL/TLS → Manage SSL sites.
- Confirm that SSL is installed on your domain.
4. Redirect WordPress to HTTPS
You now need to force all traffic from HTTP → HTTPS.
Option A: Using Plugin (Recommended)
- Go to WordPress Dashboard → Plugins → Add New.
- Search for “Really Simple SSL”, install and activate.
- The plugin detects SSL and automatically configures HTTPS redirection.
- Check that your website now shows the padlock in the browser.
How to Configure a Free SSL Certificate for WordPress (HTTP to HTTPS) – AvoidErrors
Option B: Manual via .htaccess (Advanced)
- Access cPanel → File Manager → public_html.
- Edit the .htaccess file.
- Add the following at the top:
apacheCopyRewriteEngine On
RewriteCond %{HTTPS} !=on
RewriteRule ^(.*)$ https://%{HTTP_HOST}%{REQUEST_URI} [L,R=301]
- Save changes.
5. Update WordPress Settings
- Go to Settings → General.
- Update URLs to use HTTPS:
- WordPress Address (URL) →
https://yourdomain.com - Site Address (URL) →
https://yourdomain.com
- WordPress Address (URL) →
- Save changes.
6. Fix Mixed Content
- Some images or scripts may still load over HTTP.
- Use the Really Simple SSL plugin or a tool like Why No Padlock to identify and fix them.
✅ 7. Check Your Site
- Open your site in a browser.
- Look for:
- Padlock icon
- HTTPS in the URL
- Your WordPress site is now secure.
Tips
- Free SSL certificates from Let’s Encrypt need to be renewed every 90 days (some hosts handle this automatically).
- For better SEO and security, always use HTTPS for all internal links and media.
Final Remarks
Configuring an SSL certificate on your WordPress website is a simple yet powerful step toward securing your site and building trust with your visitors. Whether you choose a free certificate or a premium option, the benefits of HTTPS—including enhanced security, improved SEO, and greater credibility—are undeniable. By taking the time to implement SSL, you not only protect your users’ data but also position your website as reliable and professional in the digital landscape. Don’t wait—secure your WordPress site today and enjoy the peace of mind that comes with a safer, more trustworthy online presence.